Michele Cheow

Turning caffeinated beverages into code since '07

  • About
  • Portfolio
  • Projects
  • Blog
  • Connect

Infinity Click

July 13, 2021 by mcheow Leave a Comment

The idea for this ‘Click for More Content’ project came to me from an old work project. The feature was scrapped in the original project so I put this together just for fun and to see if I could it.

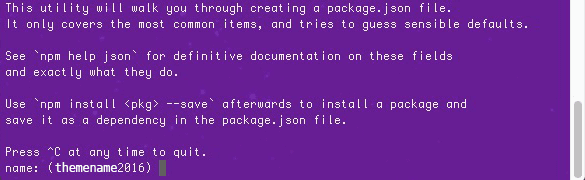
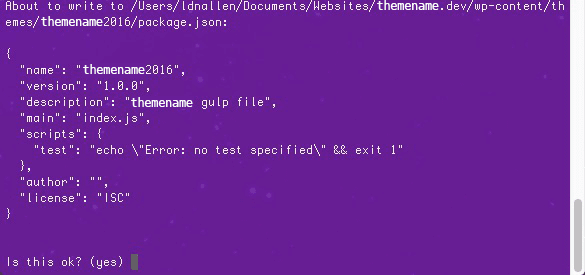
I spun up a WordPress instance, found some dummy data to populate the page and built the jQuery script that loads more content based on a click event listener.

To view the project, click here: https://infinity.michelecheow.com/

Filed Under: Projects

Scrolling on iOS

May 24, 2021 by mcheow Leave a Comment

This was not a fun bug to encounter the weekend right before a deadline. I was building a fixed position date picker at the bottom of the viewport on mobile devices. It has a click event listener on it that triggered the opening of a modal which contained the flatpickr calendar. The issue was when the user scrolled, the modal wouldn’t open. The modal would only open on load.

The element on Android was behaving as expected (of course); however, iOS was another story. Using a combination of lambatest.com and browserstack.com, I tested on the latest iOS devices and several older models.

The calendar behavior and appearance was set to trigger on resize to toggle between the desktop version and mobile version of the calendar. As it turns out, iOS has a “feature” when the user scrolls, it triggers a resize event.

I discovered this jQuery solution on stackoverflow:

// Store the window width
let windowWidthResize = $(window).width();

// Trigger Resize Event
$(window).resize(function () {

        // Check window width has actually changed and it's not just iOS triggering a resize event on scroll
        if ($(window).width() != windowWidthResize) {

            // Update the window width for next time
            windowWidthResize = $(window).width();

            // Run Mobile detect function
            detectMobileForBBModal();
        }        
});

The first line initializes a variable that stores the width of the window. The next line adds the resize event listener. The conditional checks if the window width has not changed by comparing it to width variable. If the width has not changed, the new width after resize gets assigned to the variable then you can run your function or whatever it is you want to do.

The stack overflow posting was answered 7 years ago. At the time of this writing, scrolling on iOS, version 14.5.1, still fires a resize event. I have yet to determine if this is a feature or a bug.

Filed Under: Blog Tagged With: bugs, development, iOS

Gulp 4 Starter Project

July 7, 2020 by mcheow Leave a Comment

If you’re looking for a Gulp 4 starter so you can get going fast on your new project, I’ve created one.

It comes packaged with with a gulp watch task that runs browser sync once initialized. It contains a font task that gets run with the default gulp task.

The folder structure for this starter project should be as follows:

/app
  /fonts
  /js
  /scss
gulpfile.js
index.html
package.json
package-lock.json

Running the default gulp task will create your dist folder.

Filed Under: Blog

Wynn Las Vegas

April 11, 2019 by mcheow Leave a Comment

Filed Under: Portfolio

Levy Production Group

September 22, 2017 by mcheow Leave a Comment

Filed Under: Portfolio

The NPM Rabbit Hole

April 4, 2017 by mcheow Leave a Comment

My M.O. in web development is “When it doubt, panic.” Exactly, what I did a few minutes ago before writing this.
While setting up a local WordPress install, I ran into an error message, produced when I tried to run an ‘npm’ command. After googling every error message I ran into, I finally resolved it. Here’s how:

My first issue began when I ran ‘npm install’ and got this error message:
SyntaxError: Use of const in strict mode.
I followed the second set instructions here: http://stackoverflow.com/questions/22603078/syntaxerror-use-of-const-in-strict-mode as they were concise and easy to follow. Not knowing exactly what a “helper” is and while in a panic thinking I’ve hosed my setup, I ran the command.

I then upgraded node to v7.8.0 hoping that would fix it but I was met with a new round of errors instead:
npm Error: invalid version install
Now, I was certain I was making the situation worse.

I tried going back into my theme and running npm there when I was met with:
Cannot find module 'internal/fs'
After searching, I found this: https://github.com/npm/npm/issues/14232 where I got the impression I should downgrade Node.

Next, I searched how to remove node and reinstall it. I found this where I followed the first poster’s set of instructions: http://stackoverflow.com/questions/11177954/how-do-i-completely-uninstall-node-js-and-reinstall-from-beginning-mac-os-x

I ran
npm -v and saw 3.10.10

I took note of the progress and allowed myself to calm down a little.

npm install gulp ran smoothly except for a warning message to update graceful-fs as soon as possible. However, when I ran the gulp command, I saw this: -bash: gulp: command not found

This time stackoverflow helped me out big time with this gem: http://stackoverflow.com/questions/25090452/gulp-command-not-found-after-install
I ran npm config set prefix /usr/local, went back to my theme and ran gulp

Just when you think you’ve solved it…
Run `npm rebuild node-sass` to build the binding for your current environment.
I ran the command, ran gulp and… Viola Davis!

Problem solved! Such a relief I can work again!

This post was mainly to gloat over my small victory but also as a reminder to myself to breathe when I run into problems.

Filed Under: Blog

Sass + WordPress

September 10, 2016 by mcheow Leave a Comment

If you’re new to Sass, or Syntactically Awesome Style Sheets, it can be intimidating to think about what might be involved in setting up a Sass site. However, once you learn how to do it, your styles will be cleaner, more organized and far easier to maintain. The advantages are many. What we’ll be doing here is converting a plain CSS WordPress theme to a Sass theme.

If you’re working on a PC, open Open Command Prompt, run `cmd` to start this project. From here on out, the instructions will be for Mac users but it will only vary when it comes to Command vs. Terminal usage.

If you’re working on a Mac, to get started, open Terminal which is found in your Utilities folder.


Install Gulp

Gulp is a build runner for development. It can do many things like compress js, css and image files, check for js errors, also called “linting,” as well as compiling sass, which is what we’re about to use it for now.
In order to install Gulp, first you must have node.js installed, which can be downloaded here: Nodejs.org

After installing Node, you’ll need to install Gulp by running this command in Terminal:
sudo npm install gulp -g

Take note that only Mac users need to use the sudo keyword because they need admin rights to install Gulp globally, which is what the -g indicates in the command. Installing Gulp globally gives you the freedom to run it anywhere on your computer. The npm in the command indicates that we’re using Node Package Manager to install Gulp.

Now, we’re ready to set up a Gulp project!


Set up a Gulp Project

Since I’m converting a pre-existing css theme to sass, I’m going to navigate into my theme folder using Terminal.

If you’re not familiar with basic commands use cd, which means change directory, so your command might look something like this:
cd Documents/Websites/site.dev/wp-content/themes/sometheme

Once inside your theme, run:
npm init

This command creates a package.json file, which stores all of your project’s information.

You’ll then be notified that the utility is going to prompt you through the creation of your json file:

json_prompt

After you’ve been taken through all the prompts, your terminal window should look something like this, where you’ll confirm the file:

json_confirm

Once the json file is created, run:
npm install gulp --save-dev

Since we’re not installing it globally, the -g and sudo aren’t necessary in this case. The --save-dev adds gulp as a dev dependency in our newly minted package.json.
If you take a look in your package.json inside of your theme, you’ll notice that these lines were added to the file:

json_devdependencies

If you notice in the root of your theme, there’s a new folder called “node_modules” that contains the gulp folder.


Folder Structure

In order to properly set up your folder structure, it’s best to think about what would work best for you before diving in. As a suggestion, start by creating an assets folder inside your theme. Assets will contain folders titled sass, which contains main sass files and partials, js-src which contains development js files and js, which contains the minified versions of the js files stored in js-src.

For an alternate folder structure example, take a look at this CSS-Tricks’ post, which separates the development files from the optimized files into separate folders at the theme’s root: Gulp for Beginners.


Set up Your Gulpfile.js

Create a new file called gulpfile.js and save it in the root of your theme’s folder.
Enter this line of code into your newly created js file:
var gulp = require('gulp');

By declaring this variable, we tell Node to look for the gulp package inside the node_modules folder.

With our new gulp variable, we can set up gulp tasks, like so:

gulp.task('task-name', function () {
    return gulp.src('source-files') // Get source files with gulp.src
    .pipe(aGulpPlugin()) // Sends it through a gulp plugin
    .pipe(gulp.dest('destination')) // Outputs the file in the destination folder
})

Task-name is where you’d place the name of the task to be run in the command line. In this case, you could run gulp task-name in the command line to run that task. gulp.src shows the task what files to use and gulp.dest shows where to output the files once the task has been run successfully. aGulpPlugin will be explained in the next section where we start compiling.


Compiling with Sass

Now, we’re going to add a plugin called gulp-sass into our theme. To do this, just run the npm install command like we did with gulp earlier.
npm install gulp-sass --save-dev

Be sure to use --save-dev in your command to add gulp-sass to devDependencies in your package.json file.

In your gulpfile.js, add a sass variable. The syntax looks like this:

var gulp = require('gulp'),
    sass = require('gulp-sass');

While this method of structuring the variables can be put up to debate, these variables are not going to be edited that much. If this were any other kind of js file, it’s best to write out each var.

Create your sass gulp task, which will look like this:

 
gulp.task('sass', function () {
    return gulp.src('source-files') // Get source files with gulp.src
    .pipe(sass()) // Sends it through a gulp plugin
    .pipe(gulp.dest('destination')) // Outputs the file in the destination folder
})

Take note that the aGulpPlugin placeholder from earlier was replaced with sass, as that is the gulp plugin we’re using in this case.

In order for the task to work, let’s add a source file and a destination.

To start, open your theme’s pre-exising style.css file, copy its contents and paste it into a new file, then delete the original file. Don’t worry. You have a backup to copy and paste from to your new sass files. The theme I’m working on is a genesis theme so if you are too, you’ll want to make sure your theme declaration gets maintained in your main scss file so that should be the first thing you bring over to the new sass file you’re about to create.

Create a style.scss file in the assets/sass folder, which will be added to the sass task in the gulp.src part of the return statement. We want to output the style.css file to the root of your theme’s folder, which would be the destination for gulp.dest. The end result for your sass task would look like this:

gulp.task('sass', function () {
    return gulp.src('./assets/sass/style.scss')
    .pipe(sass()) // Converts Sass to css with gulp-sass
    .pipe(gulp.dest('./'))
})


Globbing in Node

Partials, as mentioned earlier, are chunks of sass that make keeping your files cleaner and more organized. You can have separate .scss files for each site section, such as header, footer, navigation, main content area and even for specific pages. Partials also make style selectors and declarations easier to find based on their naming conventions. For instance, _header.scss or _footer.scss.
Setting up sass partials starts with learning about globbing. Globs are like regular expressions except their main purpose is looking for file path patterns:

  1. *.scss: The * pattern is a wildcard that matches any pattern in the current directory. In this case, we’re matching any files ending with .scss in the sass folder.
  2. **/*.scss: This is a more extreme version of the * pattern that matches any file ending with .scss in the root folder and any child directories.
  3. !not-me.scss: The ! indicates that Gulp should exclude this pattern from the results. In this case, not-me.scss would be excluded from the match.
  4. *.+(scss|sass): The plus + and parentheses () allows Gulp to match multiple patterns, with different patterns separated by the pipe | character. In this case, Gulp will match any file ending with .scss or .sass in the root folder.

In order to set up sass partials, we’ll need to replace the ./assets/sass/style.scss src in our sass gulp task with ./assets/sass/**/*.scss, so in using the 2nd pattern from above our task now looks like this:

gulp.task('sass', function () {
    return gulp.src('./assets/sass/**/*.scss')
    .pipe(sass()) // Converts Sass to css with gulp-sass
    .pipe(gulp.dest('./'))
})


Watching Sass Files

So we don’t have to run “gulp sass” every time we make a style change, we can use Gulp’s watch method. The syntax for that looks like this:
gulp.watch('files-to-watch', ['tasks', 'to', 'run']);

In order to watch your sass files, add this line to your gulpfile:

gulp.task('watch' function(){
    gulp.watch('./assets/sass/**/*.scss',['sass']);
})

To test this is working, go to Terminal and type in gulp watch. You can see that each time you save your sass file, the sass task runs automatically. To end the gulp session and return to the prompt, hit Control + C. To get real fancy, you can add a live reload function called Browser Sync that will refresh your browser with each change. That’s up next, stay tuned!


Live Reload

Browser Sync loads up a web server that helps with live-reloading.
To install Browser Sync, go to your Terminal and type in this command:
npm install browser-sync --save-dev

You’ll need to require browser-sync in your gulpfile.js, so your declared variable section should now look like this:

var gulp = require('gulp'),
    sass = require('gulp-sass');
    browserSync = require('browser-sync').create();

Declare a devURL variable at the very top of your gulpfile as you’ll need it for the next step. This variable stores the url for your local developer environment:
var devUrl = 'https://sitename.dev/';

Be sure to replace sitename.dev with your local url.

Now add this new Browser Sync task to the end of your gulpfile:

gulp.task('browserSync', function() {
    var files = [
        '**/*.php',
        '**/*.{png,jpg,gif,svg}'
    ];

    browserSync.init(files, {
        proxy: {
            target: devUrl,
        }
    });
})

Here, the proxy is telling Browser Sync to look for an an already existing site and in this case it’s my desktop server install.
Next, we’ll need to add some code to our sass task, using the pipe method which is a way of chaining multiple tasks together. This allows Browser Sync to inject the css into the browser whenever the task runs:

gulp.task('sass', function(){
    return gulp.src('./assets/sass/**/*.scss')
    .pipe(sass()) // Converts Sass to css with gulp-sass
    .pipe(gulp.dest('./'))
    .pipe(browserSync.reload({
        stream: true
     }))
})

Instead of awkwardly opening two terminal tabs to run gulp browserSync in one and gulp watch in the other, let’s make it so we’ll only need to enter one command that will run both tasks. In order to do that, we’ll need to add 2 more arguments to the watch task:

gulp.task('watch', ['browserSync', 'sass'], function(){
    gulp.watch('./assets/sass/**/*.scss', ['sass']);
})

What goes inside the square brackets is an array of tasks to complete before watch runs. Sass will need to run before watch so the CSS will be the latest whenever we run the Gulp command. If you go to the terminal now and run gulp watch, both the sass and browserSync tasks will run and then watch will begin once those two have completed. A browser window will appear that will pull up your local instance and each time a style change is made, the browser will refresh automagically.


Partials

The last part of this project will involve breaking out the sections from the main stylesheet into sass partials. A partial is a way of creating modular code where multiple files are created and then compiled into one. You can separate many lines of styles into several easily digestible files, which leads to clean code. When naming partials, start with an _. This flag alerts Sass that the file is only a partial, which should be compiled into style.css and not generate a new stylesheet. With this naming convention, an example of a sass file name would be _header.scss.

Edit your style.scss to include the theme’s name, description, author uri, version and template, which can be copied from your theme’s original stylesheet.

Create a new sass partial called _reset.scss, which is where all of your reset styles will go. This file will live at the root of the sass folder at the same level as style.scss.

Next you’ll want to define a sass file structure. Add folders for base, components, sections and pages inside of assets/sass.

Open your style.scss file and enter @import "base/base"; and do this for each of your partial folders. This tells Sass to look inside your base folder for a file called _base.scss. Inside _base.scss, enter @import “layout”; and add an import for each file inside of base. Repeat this process for the rest of your partials.

When complete, your file structure will look like this:

sass_file_structure
Inside of the base folder, create the following files:

  • _base.scss (This file includes the @imports to include the following partials)
  • _buttons.scss (Contains all of your button styles)
  • _forms.scss (Contains all of your form styles)
  • _layout.scss (Contains any structural styles)
  • _lists.scss (Contains all of your list styles)
  • _tables.scss (Contains all of your table styles)
  • _typography.scss (Contains all styles that handle font families, font color, weight and size)


Inside of the components folder, create the following files:

  • _components.scss (This file includes the @imports to include the following partials)
  • _breadcrumbs.scss (Contains all of your styles for breadcrumb links)
  • _columns.scss (Contains all of your column width styles)
  • _comments.scss (Contains all of your comment form/section styles)
  • _forms-gravity.scss (Contains all of your style specifically for gravity forms)
  • _forms-misc.scss (Contains all of your miscellaneous form styles)
  • _navigation.scss (Contains all styles associated with your theme’s navigation)
  • _pagination.scss (Contains all styles associated with your theme’s pagination)
  • _widgets.scss (Contains all widget title and content styles)
  • _wp-objects (Contains styles for objects, like embed, iframe, img and WP classes, like .alignright, .avatar, etc)


Inside of the sections folder, create the following files:

  • _sections.scss (This file includes the @imports to include the following partials)
  • _content.scss (Contains styles for anything styling the main content, such as entry titles and featured content)
  • _footer.scss (Contains all styles for the main site footer)
  • _header.scss (Contains all styles for the main site header)
  • _sidebar.scss (Contains styles for general sidebar styles)


Inside of the pages folder, create the following files:

  • _pages.scss (This file includes the @imports to include the following partials)
  • _404.scss (Includes all 404 page specific styles)
  • _author.scss (Includes all styles controlling the author archive page)
  • _category.scss (Contains all styles for the category archive page)
  • _front-page.scss (Contains styles for the front page)
  • _page.scss (Contains generic page styles)
  • _single.scss (Includes styles for single posts)


Break out your original stylesheet by copying and pasting into the partials you created and be sure to nest your style declarations where possible. What nesting is and how to do that are covered in the next section.


Nesting

One of the best parts of Sass is the ability to nest css declarations, another feature that keeps your styles clean and organized. Nesting allows you to place children within the brackets of the parent’s selector, which might look something like this:

.widget {
    padding: 1.5em;
    margin-bottom: 1em;
    width: 100%;
    h4 {
       font-size: 2em;
       color: #3d3d3b;
       text-transform: capitalize;
    }
}


Version Control

A note about working with sass files under version control; it’s best to stop Gulp from running before you check out other local branches. Otherwise, gulp will continue to run and may cause conflicts. In order to do this, you can close the Terminal window or hit Ctrl + C to return to your starting prompt.


Go Get Sassy!

While this tutorial only scratched the surface of what Gulp and Sass have to offer, it’s a fairly good place to start with just the basics, especially if you’re brand new to it. There isn’t one way to set up gulp so you’ll need to explore and experiment to find what works best for you and your projects. Gulp offers many packages such as sourcemaps, which helps with debugging, phpcs, a php code sniffer, and svg-sprite, optimizes and turns svgs into sprites. These 3 are just a fraction of what Gulp can do, so take a look at npmjs.com to learn more. For more on Sass, hit up the Sass website. And when you become a total fanboy or girl, get some Sassy stickers!

Filed Under: Blog

Reza Aslan

May 31, 2016 by mcheow Leave a Comment

Filed Under: Portfolio

Photofocus

May 30, 2016 by mcheow Leave a Comment

Filed Under: Portfolio

LendingMemo

May 30, 2016 by mcheow Leave a Comment

Filed Under: Portfolio

  • « Previous Page
  • 1
  • 2
  • 3
  • Next Page »
  • About
  • Portfolio
  • Projects
  • Blog
  • Connect

About MC

In west Brooklyn born and raised, behind a computer is where I spent most of my days. Codin' out all cool outside of the school.... ok I'm clearly not Will Smith.

In 2007, I got my start in web development, kept it going after college and I landed my first job at Marvel. Several years later, New York City and I developed a rocky relationship and we decided to call it quits. I set my eye on the west coast and landed in Vegas where I dug in deep with the tech scene; attending meetups and planned a few Startup Weekends.

A few years later, I bought a house, got married and planted some roots. Moving was the best decision I've ever made.

Resume

  • Download my resume in PDF format

Connect

  • twitter
  • linkedin
  • codepen
  • github
  • wordpress
  • stackoverflow
  • mail

© 2025 · Michele Cheow